Showing posts with label sewing. Show all posts

Tuesday, January 30, 2018

Quilt Guild Challenge

I belong to my local quilt guild in Lexington, VA (Rockbridge Pieceworkers Quilt Guild) and this year we did the two-color crayon challenge.  This was a lot of fun because the two colors I got could not have been more appropriate for me...
PURPLE AND ORANGE!!!
What luck because my favorite holiday is Halloween!  We could also add black, white or beige to our quilt but at least 51% needed to be our chosen colors.

Anyone who follows my work knows that I'm an out of the box thinker when it comes to my artwork.  I have made traditional quilts in the past but I consider myself a textile artist who creates art quilts; wall hangings that incorporate various textiles and most of the time an "unusual object" of some sort.

With this in mind, I went to Pinterest for inspiration.  I found a watercolor and ink painting of a female in a beautiful ball gown.  That was it!! (Pinterest link)  Using my purple and orange colors, I was going to transform this girl from a stunning blue dress to a Halloween Masquerade Ballgown!

I first researched the artist that painted "my inspiration" and her name is Inslee Haynes (or Inslee Fariss).  She is a New York City-based artist and illustrator and she can be found at Inslee By Design.

I then graphed the design to the largest size I could without going over the requirements for the challenge (100" perimeter)

My next step was to cut out my pattern and quilt a background for her.  I found this chandelier fabric at Walmart (cringe!) and I went into my fabric stash for the realistic looking wood fabric.
The quilt peeking out from the right is my Steampunk quilt

Next, let's start designing her ball gown!  Ball gowns are traditionally "pouffy and sparkly" and I enjoy beadwork and embroidery so I knew this was going to be the focal point of my design.  I went through my stash of orange and purple ribbons, beads, embroidery floss, felt and paint.  I then sat for a few days looking at what I had... waiting for inspiration.  I always tell my husband that I could never be on Project Runway because they have no time to sit with their project, they just have to cut and sew and cut and sew.  I am a slower designer.  I have to do a few steps then let it hang there for a few days and even maybe a few months!

Then inspiration hit:


We traveled (from Virginia) to Indiana for Thanksgiving and to Wisconsin for Christmas.  I needed handwork for the car and this was the perfect opportunity to finish her ballgown.

I used beige felt for her head and arms and permanent brown and black markers for shading on her arms and to draw her face.  I initially cut and sewed brown felt for where I was going to put her hair but I knew I would be covering up most of the brown felt with "3-D hair."

And then came the hair...(which I hand sewed in place)


Over the Christmas holidays, I found a white chandelier ornament that I wanted to use.  I wasn't sure how I was going to incorporate it into my quilt but it looked just like the printed background fabric.

Next came the paint and the clay.  I painted the chandelier purple and orange and added the same color beads.  I then made a masquerade mask out of orange and purple Sculpey clay then glued sequins to the mask and the mask to the stick.


Next the chandelier.  I knew where I wanted to put it on the quilt but it was big and bulky.  I remembered a wall hanging I made 8-10 months ago where I cut a hole through the quilt and strung a spider web through it.  Problem solved!

I felt like her hair needed something else, like a hair clip so something.  So I made this out of Sculpey clay also, the same material as the mask.


The challenge isn't until March's meeting so this hasn't been seen by anyone in my guild yet.  I hope that it has enough of the two colors for the challenge but if not it was a blast making it anyway.


Thanks for looking!

Friday, March 17, 2017

Reverse Wool Applique

Two weeks ago my mom and I went to the Quilt Convention in Hampton, Va.  We have done this for a number of years and I am always so inspired by other people's work.  There are vendors, quilt guilds displaying their guild challenges and anything and everything in between.  I took over 300 pictures but I'll save that for another post.  Tonight I want to tell you about this wonderful lady I met who does reverse wool applique.

Michelle May is the owner and designer at The Raspberry Rabbits located in North Carolina.  We had a wonderful chat in her booth.  I was initially drawn to her pumpkin pattern.  As I looked around Michelle started telling me the stories behind each of her works, for example, the pumpkin pattern was named "Peter's Pumpkin" from the nursery rhyme.  I did end up buying this pattern along with her adorable book called Fabled Fusions.  The Peppermint Tea pattern was inspired by Alice in Wonderland's Tea Party and Wish Upon A Star was inspired by Michelle's love of the Wonderful World of Disney show that she used to watch as a child.


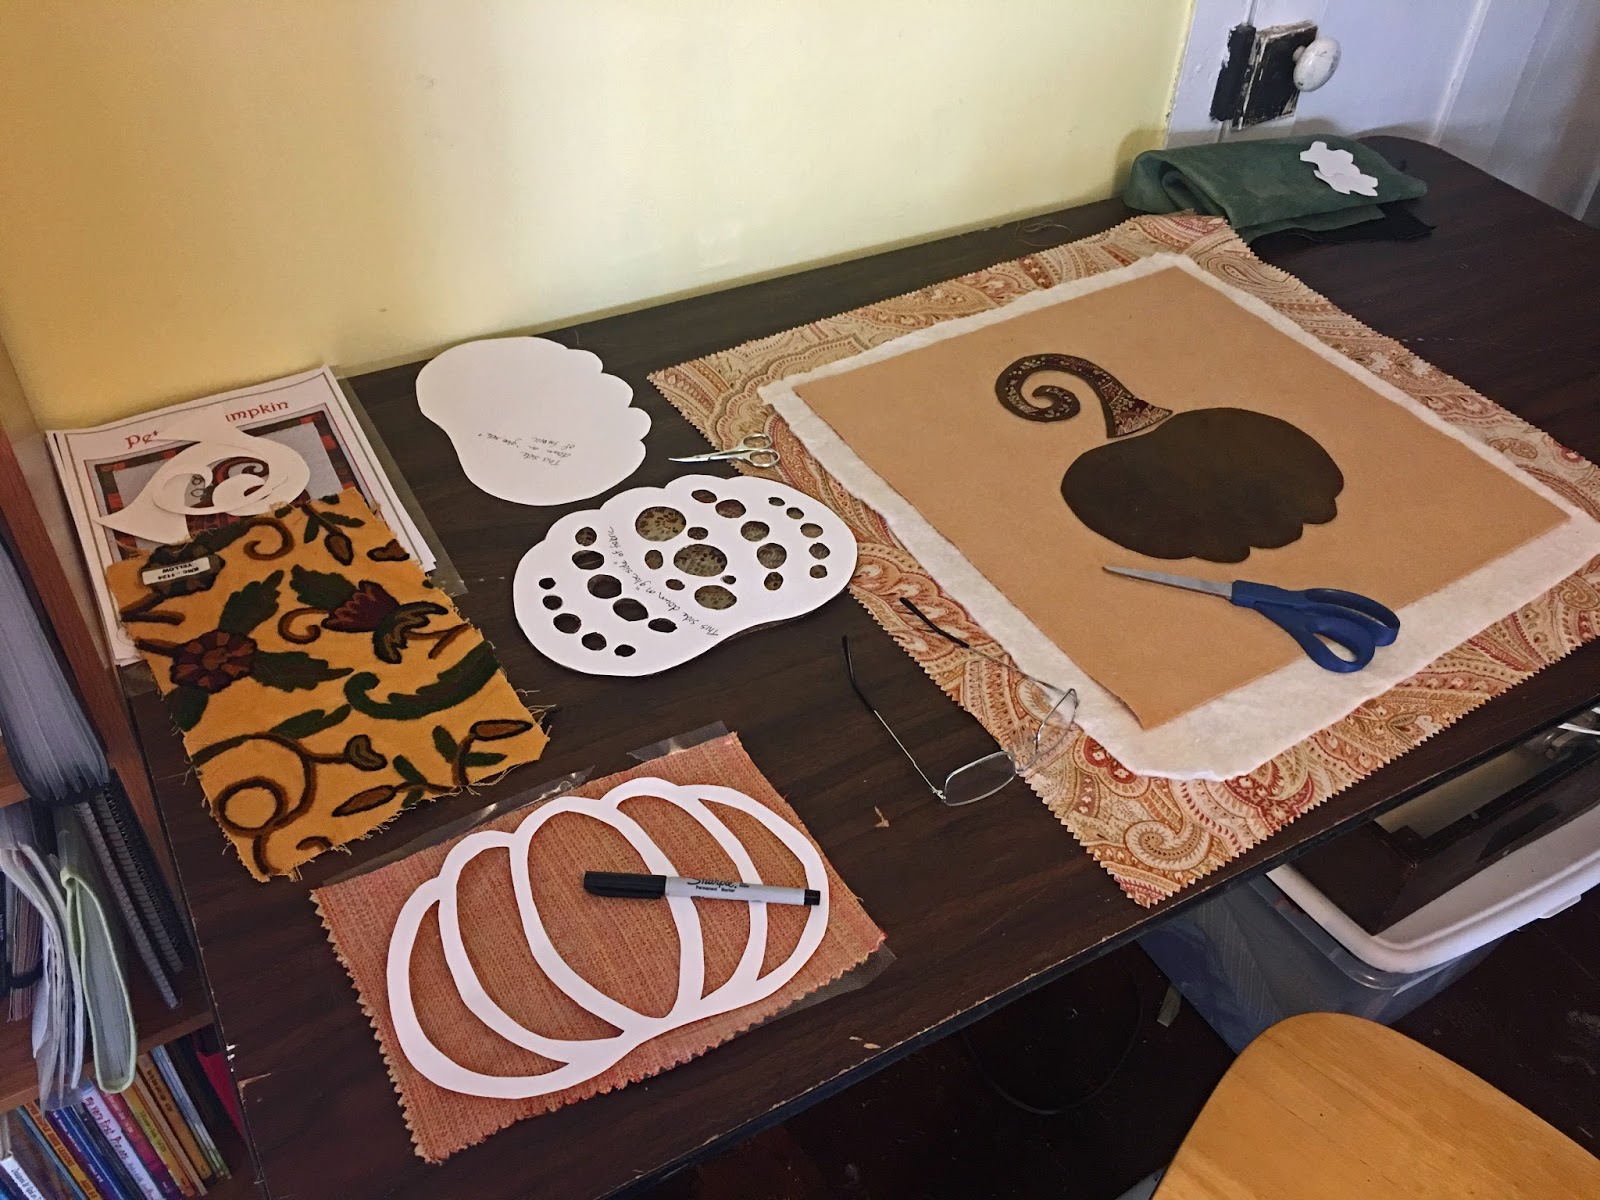
As you all know I like working with upholstery because it adds texture to a piece of work.  I told Michelle that I was going to try to make Peter's Pumpkin out of my upholstery stash:


It turned out being a little bit more difficult to work with than I had anticipated because of the many layers of upholstery (including the batting).  It was THICK and this was all hand stitched.  The backing was a velvet paisley print.  I ended up changing the beige background because it was too hard to sew through (as it was leather).  In the next picture, you can see that it is off-white wool felt.  The first layer of the pumpkin, the brown part, was in fact leather.  The second layer was a tweed upholstery and the third layer, orange, was wool felt.  The stem was two layers which consisted green velvet and the same brown leather I used for the pumpkin.

In the above picture, the upholstery with a mustard color background had a raised wool design that I cut out and then used for the vine and the decorative pieces at the bottom.


This was so much fun to do!  I think my next project is going to be O'Ryan the Stargazer from her book Fabled Fusions; O'Ryan is the cutest little owl I've ever seen!

Saturday, December 17, 2016

My new website: October Cat Studios

Without further adieu, here is my website.  I will still keep blogging here but my website is for those of you who just want to see my work without listening to me ramble on and on.  It still needs tweaking but here it is!

http://octobercatstudios.com/

I made the name plural (October Cat Studios) because I have many creative outlets and in my mind each one is a different studio, but sometimes they  like to visit each other.

Sunday, December 20, 2015

Small craft bazaar

Photos from the Winter Bazaar I was in last weekend:

I prefer making snowmen over santas

Debut of some of my altered paintbrushes

I love painting these doll chairs

My very whimsical one-of-a-kind painted doll chair

I'm now branching out and painting on other found objects as well

Another one of my painted chairs

More fabric baskets

A few Christmas coiled fabric baskets


One of my tables

Another table and I still couldn't get all of my stuff displayed

There wasn't a lot of room in the gymnasium at the school

Tuesday, November 11, 2014

Sew Sweet Simplicity BOM (#1)

I'm taking a break from making fabric bowls to refocus on quilting.  I found this wonderful lady by the name of Jacquelynne Steves on Facebook who just started a 6 month BOM quilt along.  I am so excited because I've always wanted to do a Block of the Month quilt but I didn't want to commit to 12 months.  Well Jacquelynne has created a 6 block quilt.  It has a large center piece that you can create your own pieced or appliqued design or you can use the design that comes with the pattern.  This is perfect for someone like me who likes to create her own look.

Jacquelynne Steves website is called Jacquelynne Steves: The Art of Home . You can either visit her homepage with a link to the block of the month: Sew Sweet Simplicity or click here .
This is what the original quilt blocks look like but we can choose our own fabrics and color combinations:

I have never been one to follow a pattern and that's why I fell in love with this quilt!  The possibilities are endless as far as fabric combinations and also the fact that you can put anything you want in the center.  

This quilt along started right before Halloween, one of my favorite holidays, so I was going to do a Tim Burton Nightmare Before Christmas themed quilt but changed my mind at the last minute and decided to go with a peacock theme instead.  

Here are my fabric combinations:
And before I even started cutting the pieces I got started on embroidering my peacock for the center.  I used beads and sequins as well as metallic embroidery floss:
Then I started cutting the rest of the fabric:
And here is my finished first block:

I've done half square triangles before but I've never done the flying geese pattern so this was a lot of fun.  I've already started embroidering my second peacock for the center and can't wait to get the second month's pattern so I can put that one together too!

Saturday, March 22, 2014

Spring is officially here!

And that means changing my color pallet (just a little).  I had pneumonia this past winter plus my side job of pet sitting that I can't believe I let two months slip away.  I have been working on many more new fabric bowls AND have also been exploring the techniques used in art quilts because I just don't like following patterns.

Here is a look at some of my new spring fabric bowls:


All of these are for sale at Auntie M's American Cottage in Yorktown, VA

Friday, October 25, 2013

Beachy Themed Magazine Holder

I love being in festivals, farmers markets, art shows, etc. because I meet amazing people both vendors and customers.  I love when customers have creative ideas of their own, whether it is "renaming" one of my art dolls or coming up with a new idea for a fabric bowl.  I met this lady at the Fall Festival that said her bathroom was "beach-themed" and it would be neat if I could make a magazine holder for her for that room.  All I need is a spark to my imagination and I can run with it!  This is the biggest bowl I've ever done and it took me a lot longer than I thought but here are the results:


This is a look at the back:
This is a custom order but if for some reason it isn't what she wanted it will be for sale in a few weeks.