Tuesday, November 29, 2011

For December's Show

I rarely use sketch books.  I don't know why.  When ideas pop into my head I just do it.  If I don't have the materials I find them and fast.  But when I go on trips I take a sketch book because I can't just go up to my art room and work on an idea.  When we traveled to Illinois last week for Thanksgiving I took a sketch book.  A few days before we left I had an idea for December's show at Olde Towne Art but knew I wouldn't be able to execute it before we left.  While driving there I asked my husband if I bought a large canvas in IL could we get it home in the minivan.  The show goes up December 1st so that meant I would only have a few days to work on it when we got back.  I thought I could get a jump start on it in IL then finish it in VA.  He said yes we would manage to get it home, HORRAY!!
The initial idea:
When we got there I found the perfect size canvas, 18" X 36".  I then bought some paint and got underway.
The next step was to "build" the shelves.  I went to the local hardware store and looked at the crown moulding section thinking I would find something ornate but eventually settled on a simple piece of wood.  I knew my flower idea would be dramatic so I didn't want it to get too busy.  The pieces of wood were 36" long but I needed them to be 6" so thanks to my sister-in-law's boyfriend I could saw them down right there.
Then paint them black.
I then glued them onto the canvas and painted the pedestal bases.  Next was the fun part, creating the flowers from fabric.  I wanted the centers of the flowers different and the larger perimeter to all be the same.  I wanted to quilt the centers to give it more depth so here I have all of my centers laid out on the batting.
Cut and ready for their backing:
I couldn't quilt the centers yet because I didn't have my sewing machine with me so I pinned the centers to the backing for the drive home.  On the ride home I cut slits from the perimeter towards the center because after I quilted it I wanted to wash the flowers a few times to give the edges a scrappy look. 
The last thing I needed to do before we traveled back home was to make two vases the flowers were to go in.  I needed to do this there because I knew it would take a few days to dry out.  I used air drying clay, sculpted them after Thanksgiving lunch while everyone was taking a nap, and they air dried on the dashboard of our car on the drive home. 
We made it home Saturday night and by Sunday night I  had quilted the flowers and washed them a few times.  They still weren't giving me the depth I wanted.
So when I started making these flowers I ended up with 30 but cut it down to 20 before quilting the middles.  After I quilted the middles I realized that I would only be able to fit 10 onto my canvas.  The 10 that I set aside came in real handy when I went to create that puffy middle I was looking for.

I am going to try to explain it so stick with me.  I balled up pieces of aluminum foil, squirted hot glue into the back center and stuck the ball in there then wrapped it up.  Before it was completely dry I took the second quilted flower, squirted hot glue into the right side center of that and fanned out the first flower (with the aluminum ball) and stuck it to it.  Hence four pieces of fabric and two pieces of batting for one flower.
I couldn't decide what color to paint the vases.  My initial thought was to paint them black but the pedistals were "too black" if that makes sense.  While in my garage I noticed a can of silver spray paint and it was perfect! 
And the final product:

Thursday, November 17, 2011

My notecards

I have always loved photography and believe this was my first step into the creative world.  My dad taught me how to use a camera at the age of 6 but that's another blogpost in itself (when I can dig up some old pictures).

A few years ago I started selling my photographs at the local Farmer's Market and the item that sold the most were my notecards.  I love making notecards because I can reach a larger audience.  I literally have thousands of pictures that I can turn into notecards but I like to see what the people like.  Since getting into a lot of other mediums as of late I have fallen away from my photography, and my notecards.  But I have a few relatives that keep asking me when I'm going to be doing more notecards so guess what?!  I'm getting back into my notecard business!

I have a lot of new photos to showcase plus I've gone back into my archives and have printed a lot of classics too.  I will be taking them to Olde Towne Art today just in time for Black Friday so please stop by if you get a chance.

Here is a sneek peek at some of my photography:


I hope you and your family have a wonderful and blessed Thanksgiving.  I'll be going out of town to spend the holiday with my husband's family but I'll return with a lot of new and creative ideas for Christmas, I already have my sketchbook (and camera) packed!

Tuesday, November 15, 2011

I beat my deadline

In the last post I said that in the gallery (at Olde Towne Art)  a lot of artists paint on canvas and that's how come their studios look "full".  I decided that I needed to create a few larger pieces to "cover my wall space" but I had never painted on canvas before.  Well in the art world I'll try anything once so I bought myself some canvas.  I had no idea what I was going to do so I started with my favorite color pink.  The first thing that popped into my head, that was pink, was the Breast Cancer Awareness ribbons.  I have a good friend that is battling breast cancer right now so this is in honor of her:
I wanted to add dimension after I painted the background silver so I added black paint to ceramic stucco and painted the door and ground.  I then mixed varying shades of pink with a heavy gel medium.  The ribbon is made out of pink sculpey clay.

While I was researching quotes to put on my first piece I came across a quote that inspired me to make my second piece.  This one is called Sunshine.

Again I mixed reds, oranges, yellows and gold with my heavy gel medium to create texture in the sun.  This piece, and the previous one, both measure 9" X 14".

For my third one I knew I wanted more texture whether it be fabric, yarn, paper or anything else that inspired me.  I went to a local art store where I knew they had a bin of cheap craft yarn and there I found inspiration.  My third one is called Under The Sea:
First I painted the canvas in swirls of greens and blues.  The inspiration was the bumpy yarn, it looked like seaweed to me.  Again I wanted dimension so I made the fish out of sculpey clay then painted them.
While digging through the yarn bin I found 2 more skeins of yarn that also inspired me.  My last one was made with red, grey and silver yarn and acrylic paint.  It is untitled.
I was aiming for three finished canvases before we went out of town for Thanksgiving but I managed to do four before my creativity slowed down and I am very pleased with all of them.  I will be hanging them on my studio wall this afternoon just in time for the Christmas shoppers!

Sunday, November 13, 2011

Watercolors and ACEO's

Since I've gotten space at Olde Towne Art I've been looking through my "creative endeavors" that I've tried over the years.  About a year ago I decided that I wanted to learn how to watercolor.  I've only worked with acrylics and thought "it's time to try a new medium" so I did and  I LOVED it!  I have done a few larger paintings but then I decided to try 2.5" X 3.5" which is the size of an ACEO (Artist Cards Editions and Originals).  They are quite small and I normally like to work on a much larger scale but I loved the results.

I have never framed them but since I now have space to display them I decided to look for frames for my little masterpieces.  A 2.5" X 3.5" frame is harder to find than you might think.  And even if the frame says 2.5" X 3.5" it's usually cut smaller, thank goodness I carry my ACEO's with me wherever I go.  So I found the perfect size frames but I didn't like the plaid design on them:

So I stood there with these frames in my hand deciding how I could change them... of course... deconstruct them!  The plaid was fabric so I easily ripped that off then primed it for painting.  I have eight mini masterpieces that I had to keep in mind while picking colors.  Here are three that are painted, clear coated and ready to be framed again.

And the end product looks like this:

The yellow goldfinch is my favorite.

My other favorite that I don't have pictured in a frame is my two owls:


Jacob and I will be putting these in my studio space tomorrow.

While thinking of my space, and everyone elses, I've noticed that a lot of people have works of art to hang on the wall.  I don't.  And what better reason to go out and buy stretched canvas than that... to fill up my walls!  I had an idea in mind for my first canvas piece and it involves 3 dimensional objects.  As soon as I bought a value pack of stretched canvas all of these other ideas came to me (I love when that happens!).  So hopefully I'll have all three done before Friday when we leave to go to Illinois for Thanksgiving.

Monday, November 7, 2011

My Dream

These are a few quotes I found on the Internet about loving what you do:

Do what you love.  When you love your work, you become the best worker in the world.   Uri Geller

Doing what you love is the cornerstone of having abundance in your life.  Dr. Wayne Dyer

Never continue in a job you don't enjoy.  If you're happy in what you're doing, you'll like yourself, you'll have inner peace.  And if you have that, along with physical health, you will have had more success than you could possibly have imagined.  Johnny Carson

Find something you love to do and you'll never have to work a day in your life.  Harvey MacKay

I have never had a job that was my "dream job".  I majored in psychology with a minor in sociology and because I couldn't find work in my field I fell into the retail industry.  At night and on weekends I would explore my creative side: photography and quilting.  Over the years my tastes have changed but one thing still remains the same... I love to create.

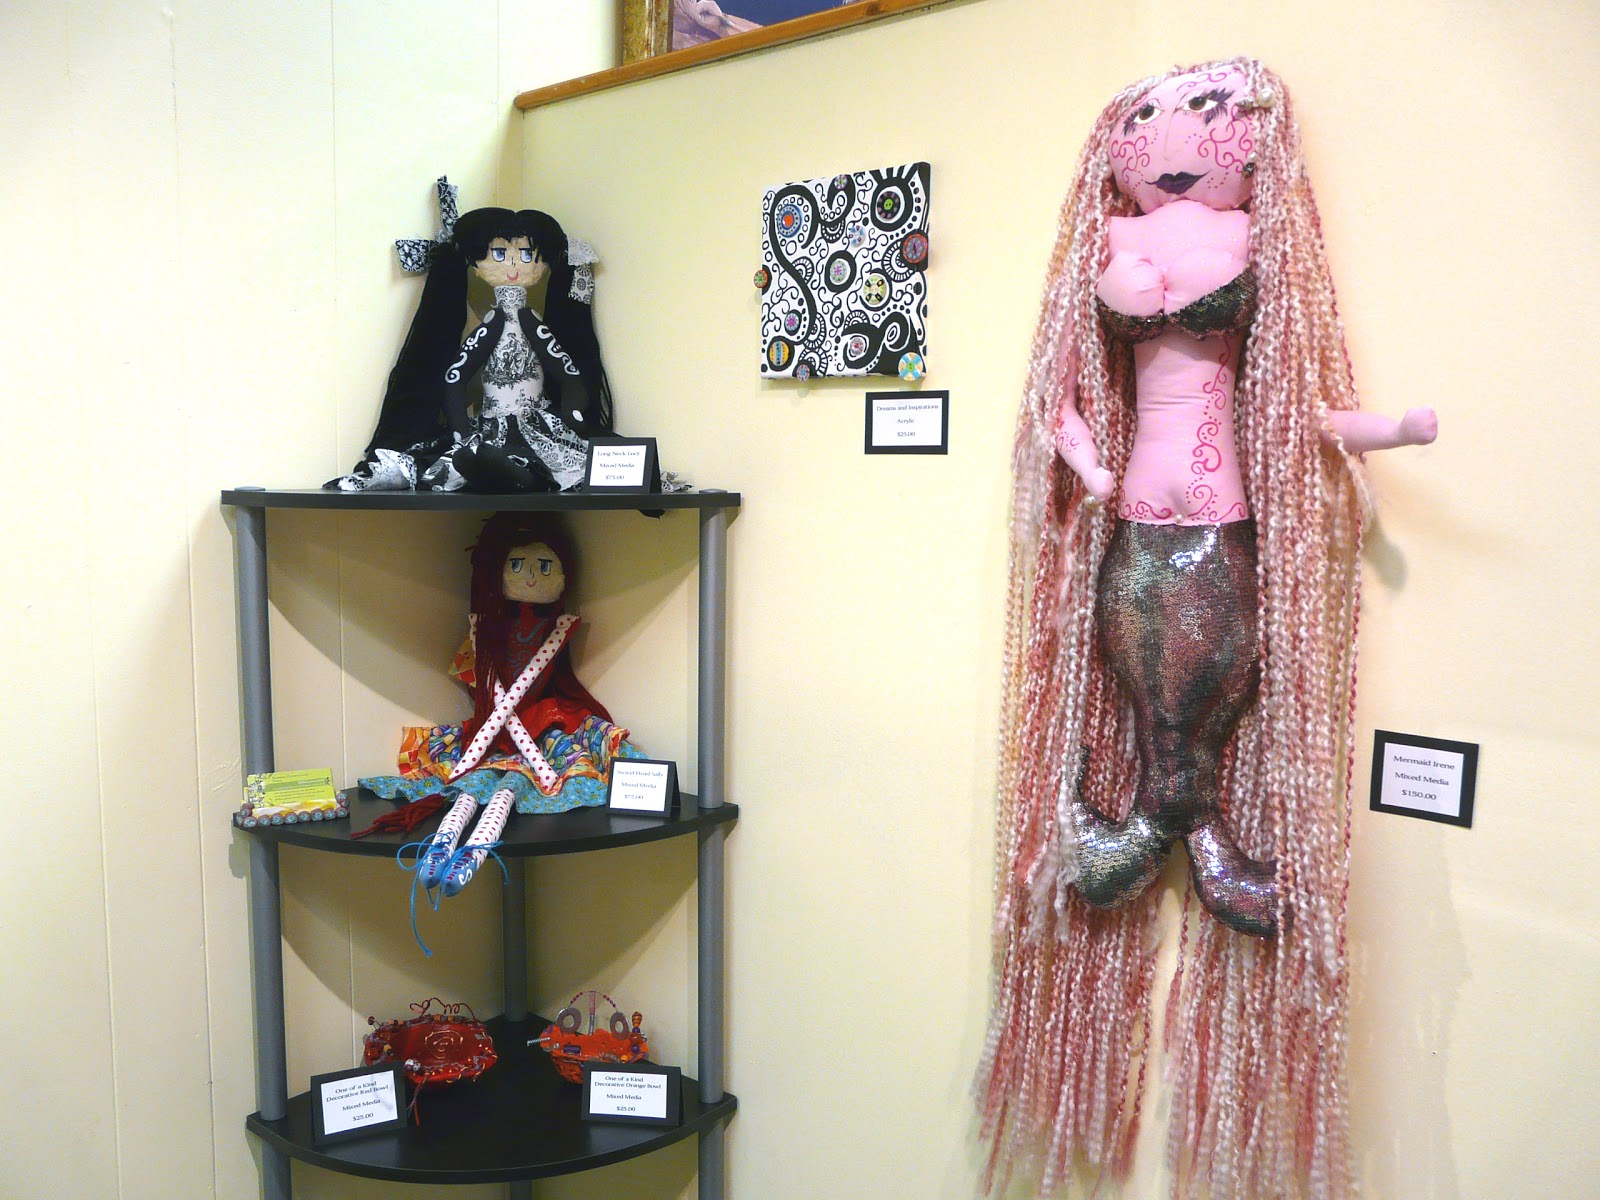
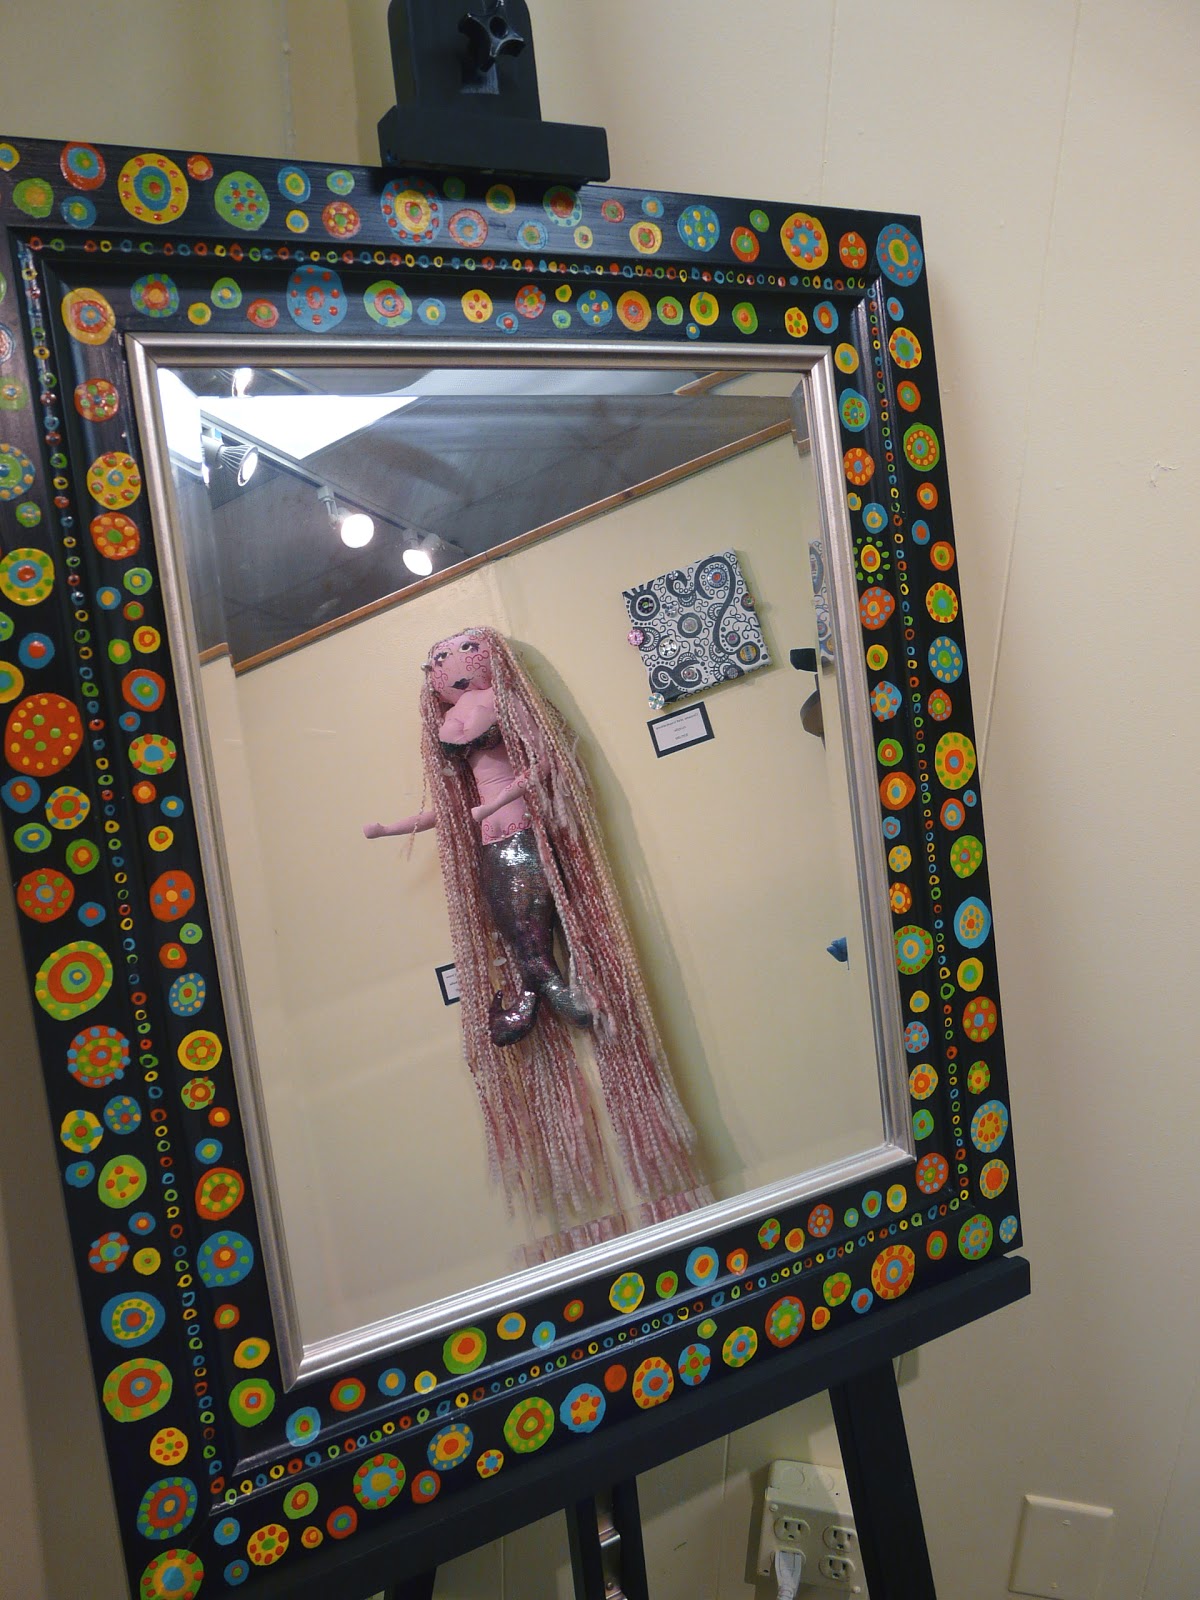
I have sold my stuff at local farmer's markets and on Etsy but a dream of mine came true last week when a studio space became available at Olde Towne Art in Portsmouth, VA.  Just think I could display my stuff year round, I don't have to be there in order to sell something AND since it's my space I can put whatever creative thing I'm working on at the moment in there... from my art dolls to my zentangles.  My little art studio for everyone to see.

I believe that God works in each of our lives but most of us can't see it, or don't recognize that it's by God's hand, but when we do it is so powerful.  And it's yet another testimony of His loving grace.

Here is a peek at my studio space.  I'm still trying to fill it up but if you're ever in the area please stop by!

My space 

A few of my art dolls

My zentangles

One of my painted mirrors

My painted button pendants and brooches

Follow this link: Olde Towne Art

Monday, October 24, 2011

Swivel Head Sally

A few months ago when I became interested in making art dolls I showed you a picture of a red and white apron that would eventually turn into Swivel Head Sally.  This apron was from a box lot I won at an auction for $1.00

I draw all of my own patterns so when I was thinking about her torso I thought of two triangles, one inverted so the waist was small.  I created the body out of the red fabric because there was more polka dot fabric and I knew I wanted to make the legs real long.

I was only going to use the fabric from the apron to create this doll.  I went ahead and cut out a little red skirt.  I had in mind to layer the polka dot fabric with the solid fabric.  There wasn't enough to do this so I went to my fabric stash and picked out three random pieces of fabric that I had leftover from other projects.
Eventually I would use the decorative stitches on my sewing machine to "hem" each layer.

This is swivel head Sally waiting for her head:
She was without a head for some time because I didn't want to make another fabric head.  They are art dolls because one uses different mediums in the same design.  I decided I would mold a head out of Celluclay.  This would be fun because I could get my three and five year old boys involved too.

This head turned out to be her sisters head because I wanted Sally's a little bit more round and this ended up being very flat on the bottom.  But I ended up doing something a little bit unique with this form that I'll tell you in the next blogpost.

Meet Swivel Head Sally:
Her ponytail sits right on top of her head and is held by a scrap of fabric from one layer in her skirt.  After I painted her face I sealed it with Delta Ceramcoat Interior Varnish.  Then I painted the free form design on her torso.

  And last but not least her shoes...

Before I painted the red and white polka dot fabric blue I coated it with Aleene's Fabric Stiffener and Draping Liquid.  This has a total of about five coats including a sealant.  After everything was dry, the very last thing I did was to lace up her little ballet type slippers. 

Saturday, September 24, 2011

The Crafting Community

This morning the YMCA was hosting an arts and crafts show.  It's the first one I've been to in a long time so I couldn't wait for Saturday to get here.  I knew it would be small so I told my husband I shouldn't be long plus it was right around the corner from our house.

When I walked in there was a lot of jewelry, Tupperware and stuff I wasn't interested in... but I am here to tell you that in this gymnasium (where they had the music way too loud) I met three amazing people.  As an artist I look for unique things, things that I've never seen done before and these three people had that.  

Daniel Wayno was the first booth that made my jaw drop.  What attracted me to his booth was the fact that he was wearing a vest made out of jump rings.  And if you've ever worked in jewelry you know how frustrating jump rings can be!  When I commented on his vest he pointed out to me that his viking Lego man had the same one on but in his size.  Wow.  He had bracelets, necklaces, earrings and anklets made out of jump rings.  All sizes and all colors.  I was fascinated by the smallest jump rings that he used and how tedious that must be.  He was extremely nice and I ended up buying one of his ever-so-small-jump-ring bracelets.  (Picture coming soon)

The second artist's name was Katherine Gonzalez.  What initially attracted me to her booth was light switch plate covers.  There was a cat cover that caught my eye.  As I was pondering this purchase I glanced over to another table of sepia photography.  As I looked closer I noticed her sign that said "Alphabet Photography".  Amazing.  All of these pictures were images of different towns and locations that seemed to form letters.  She had one in black and white but I liked the sepia much better because the letters just seemed to sneak out at you.  She had phrases like Faith, Hope and Love.  I ended up purchasing one that was personalized.  I spelled my name KIM and was able to pick out the pictures that formed these letters.  I have never seen this done and I've been doing photography for a long time. (picture coming soon).

The third lady's name was Fran Thompson.  She was actually the aunt of Daniel Wayno (the first gentleman with the jump ring vest).  What first attracted me to her booth was brightly colored fish painted on shudders.  The shudders were horizontal and two fish were facing each other kissing.  They were precious.  She was very personable and the more we talked the more intrigued I became with one of her works on the backside of her display.  It was a lighthouse that was cut out of paper.  It was very intricate and the colors just seemed to pop off the paper.  She explained to me that they were paint chips that you can get (free) at any hardware store. I loved, loved, loved it.  She told me other things she had made with paint chips on note cards for family and it was so much fun brainstorming with her.  This is why I love the crafting community, when like-minded people get together beautiful things happen.

I wish all three of you the best of luck in all of your crafting endeavors!

Tuesday, September 13, 2011

Perks of being creative

I am an organizational freak.  The clothes in my closet are arranged by color, my linen closet has labels on the shelves and all of my thread hangs on the wall neatly organized.  

I have recently started hand sewing clothes for my art dolls which means one thing... I need to organize my needles!  Look at this, this makes me crazy, this is how I used to keep my needles, in a plastic Ziploc baggie.  (When I decided to take the picture I had already taken out all of the needles but you get the point)
One of the perks of being creative is that I can do something about my needle fiasco without spending a dime... make something a little bit more attractive and organized.

Let me backtrack just a bit.  A few weeks ago when I asked my mom if she had any Elinor Peace Bailey patterns or books (and of course she did!) she also had fabric.  Elinor Peace Bailey Fabric, who knew!  I wanted to save it for something special and unique because it's so cool looking, and you can't just use this fabric for anything because it is so eccentric.
I wanted to make a quilted needle holder so I picked out a solid color for the interior (so I could actually see my needles) and free-form quilted it.
Then I squared it up

And as I was sewing the binding on I decided to put a clear pocket on one side for other sewing essentials like a thimble and scissors.  The binding isn't perfect but it works.  Now my chaotic world is in harmony again because I can find the needle I need just at a glance.