For Christmas I received a subscription to Quilting Arts Magazine. I love this magazine because it combines quilting with other mediums (right up my alley!). I started making art quilts about 1-2 years ago, embellishing with found objects and beads. This magazine shows me how to create my own fabrics with dyes, stamps and silk screening. An article in the December2014/January2015 issue entitled Jewels for the Wall by Natalya Aikens inspired my next creations. She made mini art quilts, framed them and then painted the frames to match the colors in the quilts. Mine, of course, looks nothing like hers but that's the beauty of art! Every artist has their own talents and interpretations of their world.
This was my very first one:
I only used fabric, beads and paint.
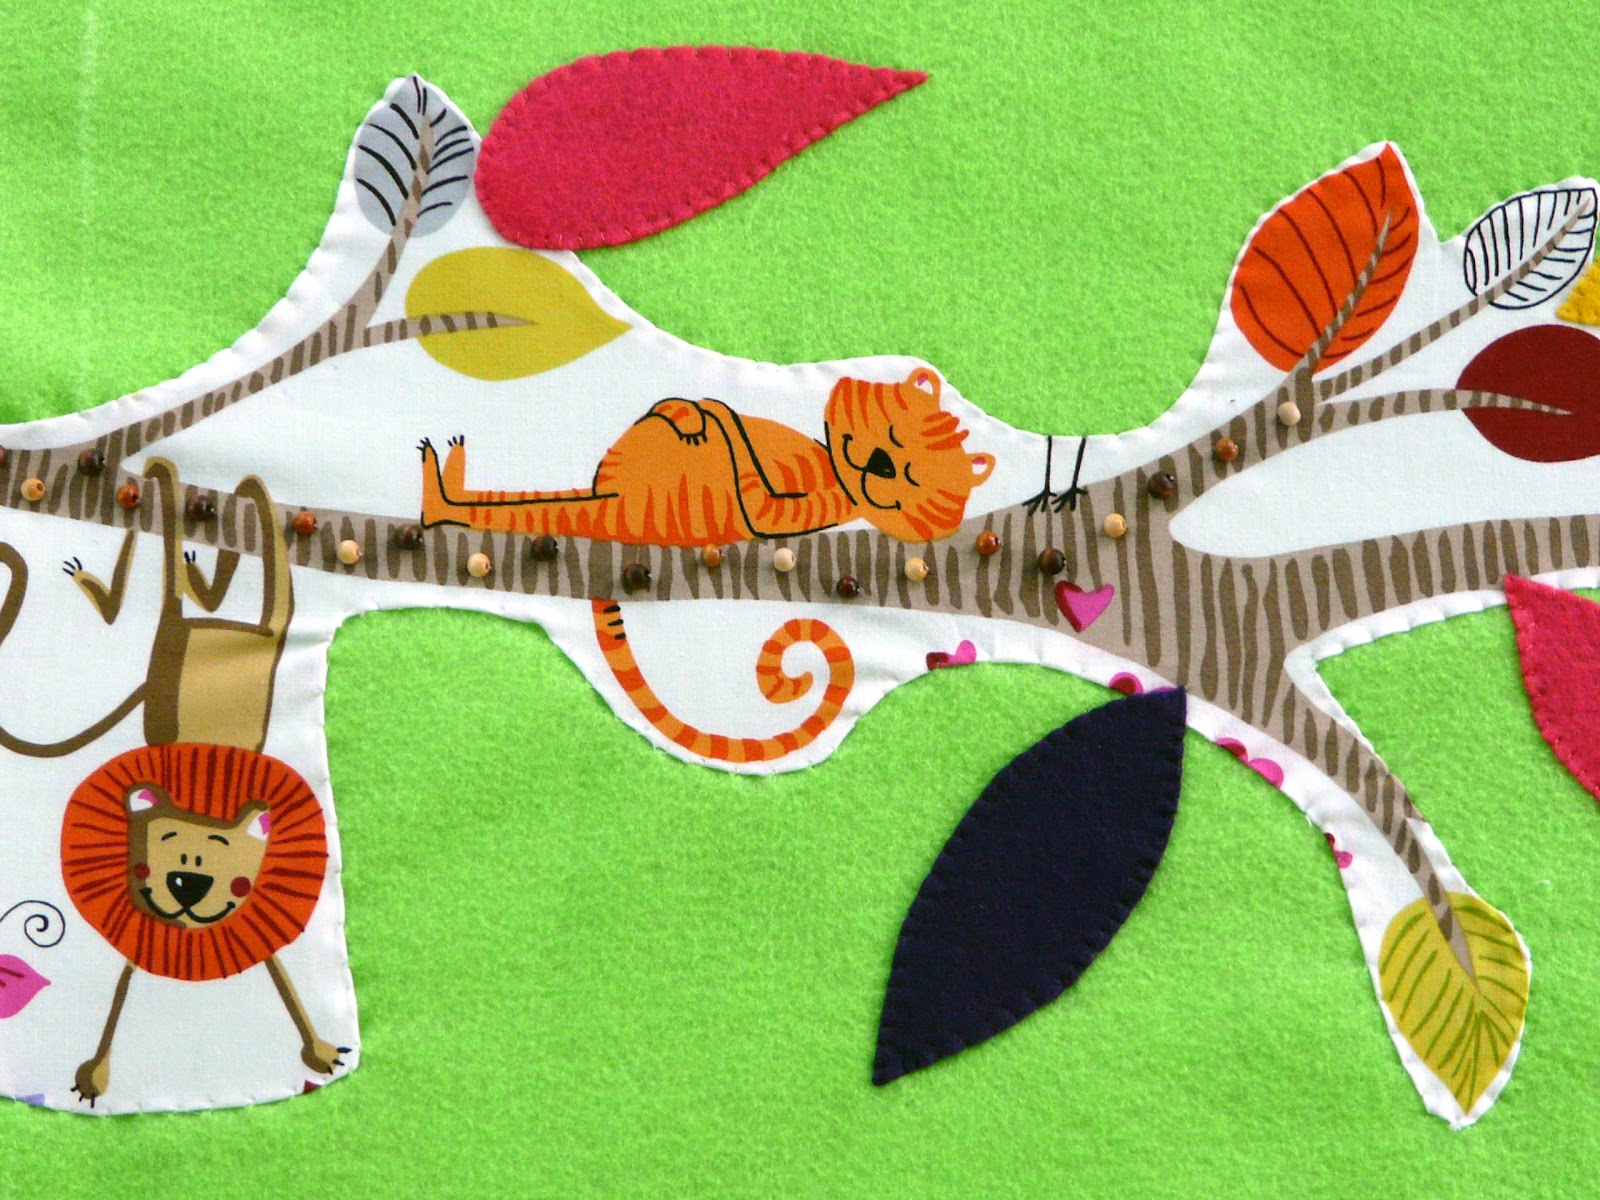
And because I love owls this was my second one:
For this creation I used fabric (the owl), upholstery (the gray background and the blue branch) and puffy paint (little designs coming off the branches). There are also beads sewn on the eyes.
My third one is my absolute favorite because it's not as tight or structured as the last two. I call it Steampunk and Butterflies.
(again I used fabric, upholstery, beads, clock parts and other hardware)
(top part):
(bottom part):
This is the start of two new creations. I will be embellishing with seashells, sea grass and of course more beadwork. The horizontal frame will be the seashore and the vertical frame will have lighthouse fabric in it.
These and many more creations will be for sale in my booth at the Newport News Fall Festival of Folk Life first weekend in October, please come out and see me!
Showing posts with label flowers. Show all posts
Saturday, February 14, 2015
Wednesday, July 30, 2014
Throwback to my photography days
When there is just too much going on in my personal life to update my blog I will post some of my photography:
I hope everyone has a beautiful day!
Sunday, February 10, 2013
Oil painting!
I have never had the desire to work with oil paints, maybe because it was the drying time that turned me off. Maybe because I knew that all the Masters painted in oils and it was very intimidating. I started out with acrylics probably because that's what my mom paints with plus sometimes she gives me her extras. Most of my first brushes were from her also (she calls them her "scruffy brushes"). So I started out in acrylics. Then a few years ago I decided I wanted to teach myself watercolors so I checked out books at the library, bought books online and practiced. I loved watercolors. Just about a week ago I decided that I wanted to try oil paints.
I have always been a big fan of Georgia O'Keeffe. I have a board on Pinterest of some of her work here. Most of her paintings are extreme close ups of flowers just like a lot of my photography. So that's where I started, books from the library on oil painting and my photography pictures. My favorite flower is the black-eyed susan so I found a picture and started sketching.
Start with the lightest color first
Then the darker colors and here is the finished product
Before this one was completely finished I started sketching my second one, two little Amish children watching the horse auction in Lancaster, PA. I took this picture last year among hundreds of others so I think I may do an Amish series. Anyone that knows me knows I am slightly obsessed with the Amish (and I'll be going up there again this year, I can't wait!)
Thursday, May 31, 2012
Doing a lot of hand sewing these days
I think the reason why I haven't posted in a while is because hand sewing takes awhile! I am still in love with felt and fabric applique and this is what I am now doing most nights after my boys go to bed.
I haven't worked on this project much more except for sewing blue beads into the water pattern and a few pearls into the rocks and shells at teh bottom. As you can tell I still haven't finished the metallic green embroidery work in the the coral.
The reason why I haven't finished my underwater project is because I've been spending time In My Flower Garden. Please don't be fooled, I don't have a green thumb... I've been creating a felt garden. This was the the beginning stage:
I mount my finished pieces on stretched canvas (like I did with Gypsy Love) so that's what the white chalk outline is for. This piece will eventually measure 8" X 10".
If you have been reading this blog for a while you know how much I love buttons and painting on them. So after I cut out these designs I found 5 of my painted buttons that I thought went pretty well with the colors of felt I had chosen. Then... let the hand sewing and embroidery (and bead work) begin!!
And this is my newest piece I finished a few days ago. In My Flower Garden.
Close up of details:
And right now I would get back to my underwater felt applique but I found this adorable fabric the other day that I knew immediately what I was going to do with it. First it involved making a 40" X 12" frame, buy felt to cover the frame then start appliqueing!
The cat laying on the branch on the left hand side caught my eye in the store. Again if you see the white chalk lines, this is where the felt will be wrapped around the canvas.
I have also added 7 felt leaves to fill it in and to have fun doing bead work on them later. Inspiration will be taken directly from the leaves in In My Flower Garden. The two dark leaves are purple not black as they appear.
The only work I've done on this piece so far, besides sewing everything down, is to start sewing wooden beads onto the branch but I have lots more to go so stay tuned!
I haven't worked on this project much more except for sewing blue beads into the water pattern and a few pearls into the rocks and shells at teh bottom. As you can tell I still haven't finished the metallic green embroidery work in the the coral.
The reason why I haven't finished my underwater project is because I've been spending time In My Flower Garden. Please don't be fooled, I don't have a green thumb... I've been creating a felt garden. This was the the beginning stage:
I mount my finished pieces on stretched canvas (like I did with Gypsy Love) so that's what the white chalk outline is for. This piece will eventually measure 8" X 10".
If you have been reading this blog for a while you know how much I love buttons and painting on them. So after I cut out these designs I found 5 of my painted buttons that I thought went pretty well with the colors of felt I had chosen. Then... let the hand sewing and embroidery (and bead work) begin!!
And this is my newest piece I finished a few days ago. In My Flower Garden.
Close up of details:
The cat laying on the branch on the left hand side caught my eye in the store. Again if you see the white chalk lines, this is where the felt will be wrapped around the canvas.
I have also added 7 felt leaves to fill it in and to have fun doing bead work on them later. Inspiration will be taken directly from the leaves in In My Flower Garden. The two dark leaves are purple not black as they appear.
The only work I've done on this piece so far, besides sewing everything down, is to start sewing wooden beads onto the branch but I have lots more to go so stay tuned!
Saturday, March 3, 2012
Making Acrylic Paint 3-D...
and I'm not talking about using gel medium to make it "stand up".
So here was my idea, gently mix different colors of acrylic paint on parchment paper then let dry for a few days. For my first endeavor I decided to mix purple, lavender, pearl white and a gold tone color.
I decided that eventually they would become flowers so next I had to paint a canvas for them. I didn't want to do the traditional green glass and blue sky so I pulled from these colors and made the sky beige and the grass purple (and tilted it sideways for fun).
I forgot to take pictures of the next step so bare with me.
After a few days of letting my paint covered parchment paper dry completely I pealed the paint off. In some spaces where the paint was a thinner layer it broke off but that was ok because I was going to rip it apart anyway.
Next came the fun part. I balled up these pieces of dried acrylic paint and then glued them onto the canvas. After I was pleased with the placement of these I noticed that I still had a big piece of dried acrylic paint leftover. I decided to glue this towards the bottom and make it look like a vase. Finally I painted the leaves and stems. I had to spray a clear coat onto the flowers because when the paint started to get stiff it flaked very easy.
When I took it to my studio space at Olde Towne Art my colleagues loved it! Within 2 weeks it was sold (glad I took pictures!) For our March show I decided to make another one but larger. Same concept, more flowers and more 3-D. This time I started by painting the canvas then picking the colors for the flowers. The black vases may look like toilet paper rolls but they are actually bigger.
Don't these swirls look fun?
After I pealed them up from the parchment paper I made them into flowers, glued them down then painted the stems.
At first I was going to have the blue flowers in one vase, orange in the second and pink in the third but after I had it set up that way there seemed to be sort of a disconnect so I added colors from the other two to make it look a little bit more cohesive. Here is a side view so you can see the three-dimensional effect:
And a close up shot:
It was well received last night at the opening of our new show but now I need more ideas of things I could turn these into because I'm sick of flowers now.
Friday, December 16, 2011
Photography and flowers
I love taking all kinds of pictures but I always come back to my flowers. Flowers are so beautiful and from different angles they take on different looks. God created this whole earth and I believe He gave us flowers to show his extreme love for us. I like getting as close as I can for a flower shot and it's a bonus for me if it has a bumble bee or a butterfly on it.
In my photo folders I used to have my flowers labeled according to location but, being the organized person I am, I decided to create folders of flowers according to their color which is working out a lot better for me. Here is just a small sampling of some of my flower pictures created in mosaic form:
Subscribe to:
Posts (Atom)