Showing posts with label upcycled. Show all posts

Friday, April 28, 2017

Save the Date!

October 7-8th, 2017... I've been accepted into the Newport News Fall Festival of Folklife so please come see me!!  Here is a temporary link NN Fall Festival  I will update this link as they update their website.  I don't have my booth number yet but you all will be the first to know where to find me.

I will still be selling my fabric bowls but will have new items as well.  A new line I will be introducing is my whimsical hand-painted home decor.  Here is a sneak peek of my pink and black end table:
Before

After

A close-up of the base:

I am also working on a child's bench that I will have in the show so stay tuned I'll be posting pictures soon.

Sunday, December 20, 2015

Small craft bazaar

Photos from the Winter Bazaar I was in last weekend:

I prefer making snowmen over santas

Debut of some of my altered paintbrushes

I love painting these doll chairs

My very whimsical one-of-a-kind painted doll chair

I'm now branching out and painting on other found objects as well

Another one of my painted chairs

More fabric baskets

A few Christmas coiled fabric baskets


One of my tables

Another table and I still couldn't get all of my stuff displayed

There wasn't a lot of room in the gymnasium at the school

Wednesday, December 9, 2015

Upcycled Paintbrushes

If I tried to explain how my creative brain works sometimes you might get lost or dizzy.  I have never been one to keep a sketch book but lately I've found that it's now the only way to organize my thoughts.  I quit my day job a few weeks ago which now allows me to devote more time to my family, my two boys, and my art.  
Ok so back to these altered paintbrushes... They are fun!  They are whimsical! They are way out of the box!
I will be doing a small arts and crafts show this weekend and will be debuting them there:

"Shabby Chic"

** "Ladybugs"


"At the beach"

"Steampunk"


** The ladybugs on the ladybug paintbrush were made using flat black stones, I then painted them and put a clear top coat on them to protect from chipping.

Thanks for looking!!

Thursday, October 22, 2015

Two of my "in progress" art quilts

I cannot believe my favorite upholstery store is going out of business!!  This store was a hidden gem for me.  When one first enters this shop it seems pretty small, then there are swing doors to the second part of the store.  The first room housed most of the upholstery, the second room had mainly trims and tassels.  Then there was a third room in the back!  This is where I get super excited because they have bins and bins and bins full of remnants... CHEAP!  When I started making art dolls years ago I would use these remnants as their clothes.  Some upholstery is very textured and rich in colors and there are different types of patterns that you can't find in a traditional fabric or quilt shop. 

Since my artistic endeavors change like the wind I can usually find various uses for my art supplies.  Sometimes if I'm working on two different projects in two different mediums they will overlap, hence my love of art quilts.  Art quilts combine traditional quilt methods with a modern twist, usually adding unexpected objects to beautiful wall hangings. And this is where my ideas overlap... I could use my upholstery remnants as a base to creating unique one-of-a-kind art quilts!

This was one that I started a few months ago:
Of course it was 2-D until I added beads, yarn, ribbon and puffy paint to it.  I also made some of the centers stand out by using extra upholstery and stuffing it with cotton.
Then I found some of my old sculpey beads that go almost perfectly with these colors!  I probably made these in the early 90's.
(circular bead in the bottom right hand part of the photo)
Again this is not finished yet.

Last week when I went to this upholstery shop again (they aren't closing until at least December) I found this remnant that I fell in love with!  The moment I saw it it inspired me.  The dark brown part of the leaves are velvet and feel oh so soft!  Here was the picture I took a few days ago after quilting it and hand sewing a row of gold beads:
As you can tell by the photo there are gold accents on the beige background part of the upholstery.  When I quilted over this it seems to disappear so I wanted to make that stand out again... fabric markers to the rescue!  I have also added decorative yarn and turquoise beads.

I have a huge collection of beads and usually I can find the right colors to go with my projects.  Here is a photo of everything I've used so far:

As with the first one posted here I like to work on these for a while then walk away for a few days. This is why I could never be on Project Runway, sometimes they only have one day to complete a challenge!  Anyway, when I return to a project it is with "new eyes" and I am able to be inspired again.

Wednesday, October 21, 2015

Steampunk and it's after effects

It all started with a show called Steampunk'd.  This is Wikipedia's definition of this genre:

"Steampunk is a subgenre of science fiction and sometimes fantasy that incorporates technology and aesthetic designs inspired by 19th-century industrial steam-powered machinery.[1][2]  ...steampunk works are often set in an alternative history of the 19th century's British Victorian era or American "Wild West", in a post-apocalyptic future during which steam power has maintained mainstream usage, or in a fantasy world that similarly employs steam power."

I'm not sure why I'm intrigued by this form of art, I think I like it because it's so different than any other art I've done. (I'm also starting to get into Shabby Chic but that's a whole different blogpost).  Steampunk has to do with gears and mechanical objects usually powered by steam.  
This photo is from a wallpaper app on my phone:

I love creating one-of-a-kind art quilts and the theme of steampunk lends itself really well to an art quilt.  With an art quilt I can attach gears and leather and paint a Nerf gun to look "post-apocalyptic" to add to the 3-D effect.  Believe it or not steampunk fabric does exist but I had to order it online.  

(photo to come!)

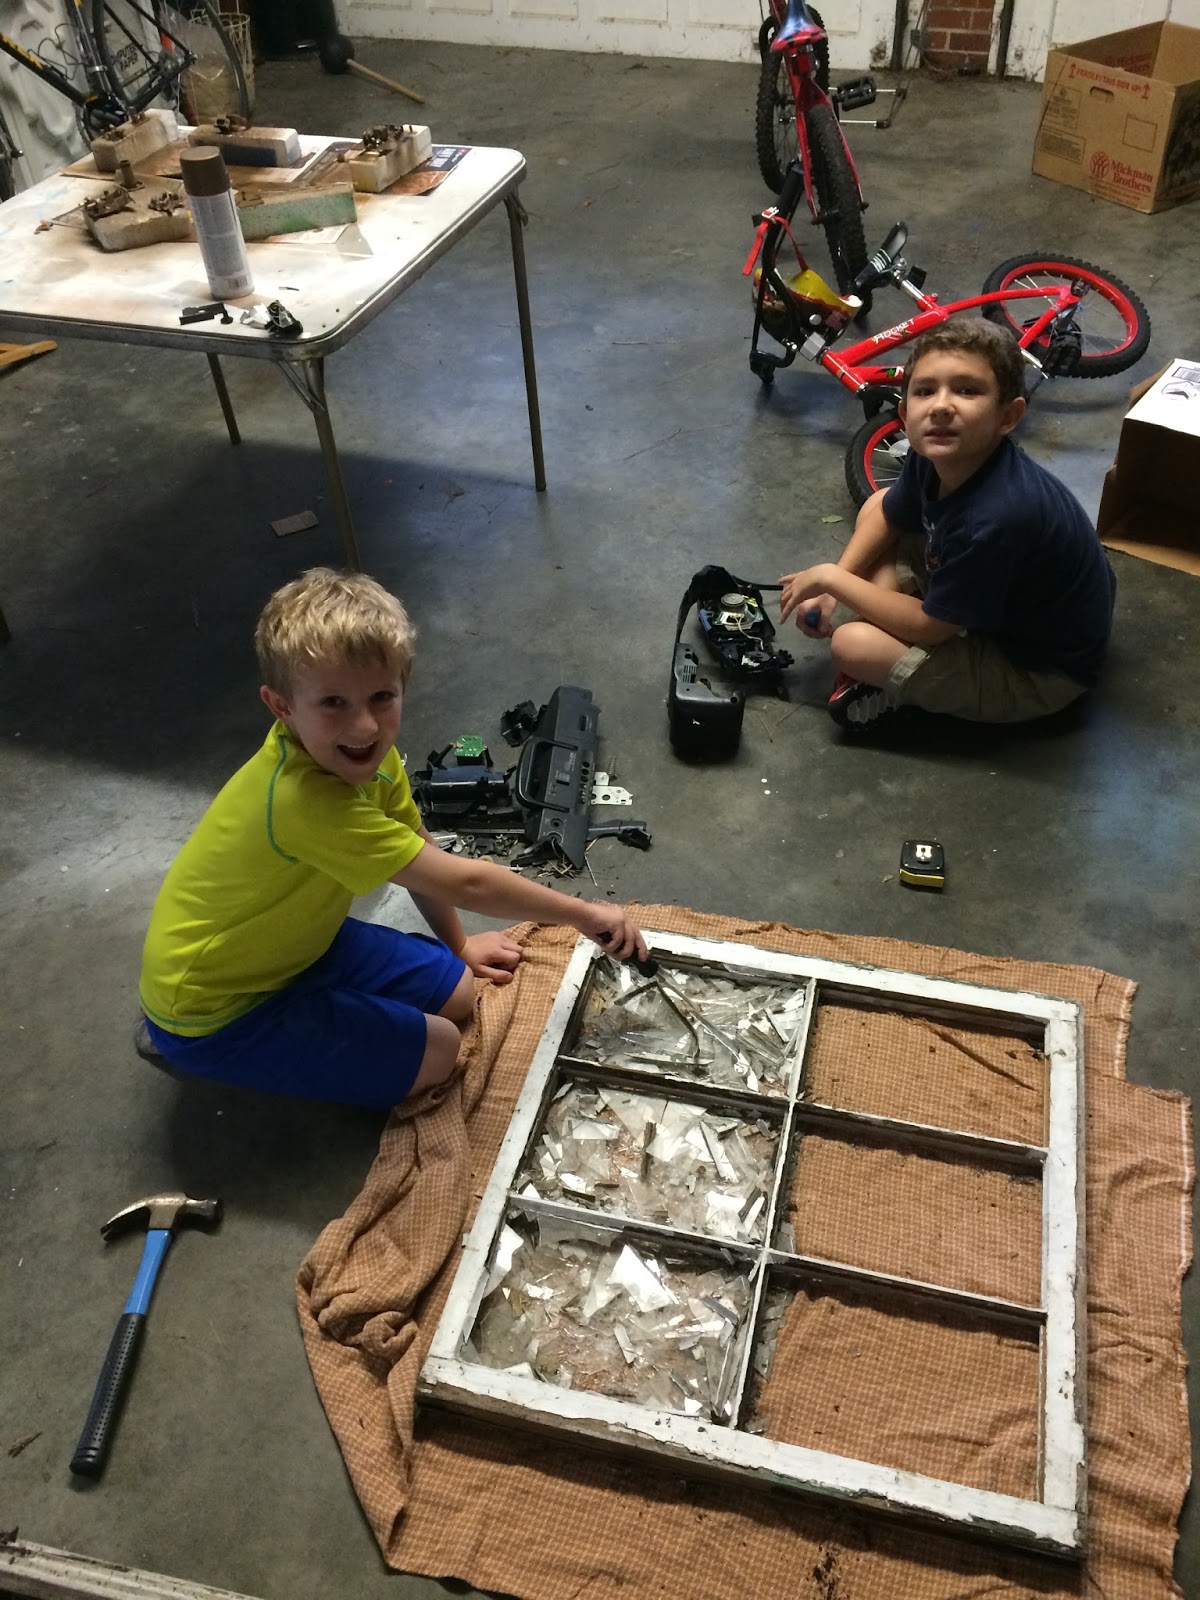
Another idea I had while creating this is that I could easily find gears and parts if I take apart other electrical things.  Thrift stores are my best friends so off I went!  I have two boys and when I asked them if they wanted to help me smash things they said "SURE!"  We had so much fun that day smashing a "boom box/CD player" from the 90's.  Joshua (blue shirt) is still working on the radio while Jacob (yellow shirt) and I moved onto breaking out the glass from an old window pane for another project (again Shabby Chic for the window pane),

After taking apart a few things and looking on Pinterest (small addiction) I stumbled upon "Assemblage Art".  This art form is called by many different names like upcycled art and junk art.  If you click on this link it will take you to my assemblage art board on Pinterest.  I am now working on two different projects (actually three, paper quilling, but again for another blogpost) so please stay tuned because there will be plenty more pictures in the next post.  

Thursday, June 19, 2014

Featured Friday artist: ?? (he or she is even a mystery to me)

I would love to give credit to this artist, and I have searched for weeks to find a name, and although I haven't found the designer I really wanted to share these with you because I find them so interesting!

Last week I was at an antique mall in Virginia Beach, Barrett Street Antiques, and normally when I make it over there (about 1/2 hour drive) I go directly inside.  I have really been in my "creative mode" lately and I LOVE recycling old things.  When I pulled up this time I noticed that there were a lot of garden things outside.  Old statues laying around as well as life preservers and buoys, old wrought iron furniture and the like.  My kinda place! 
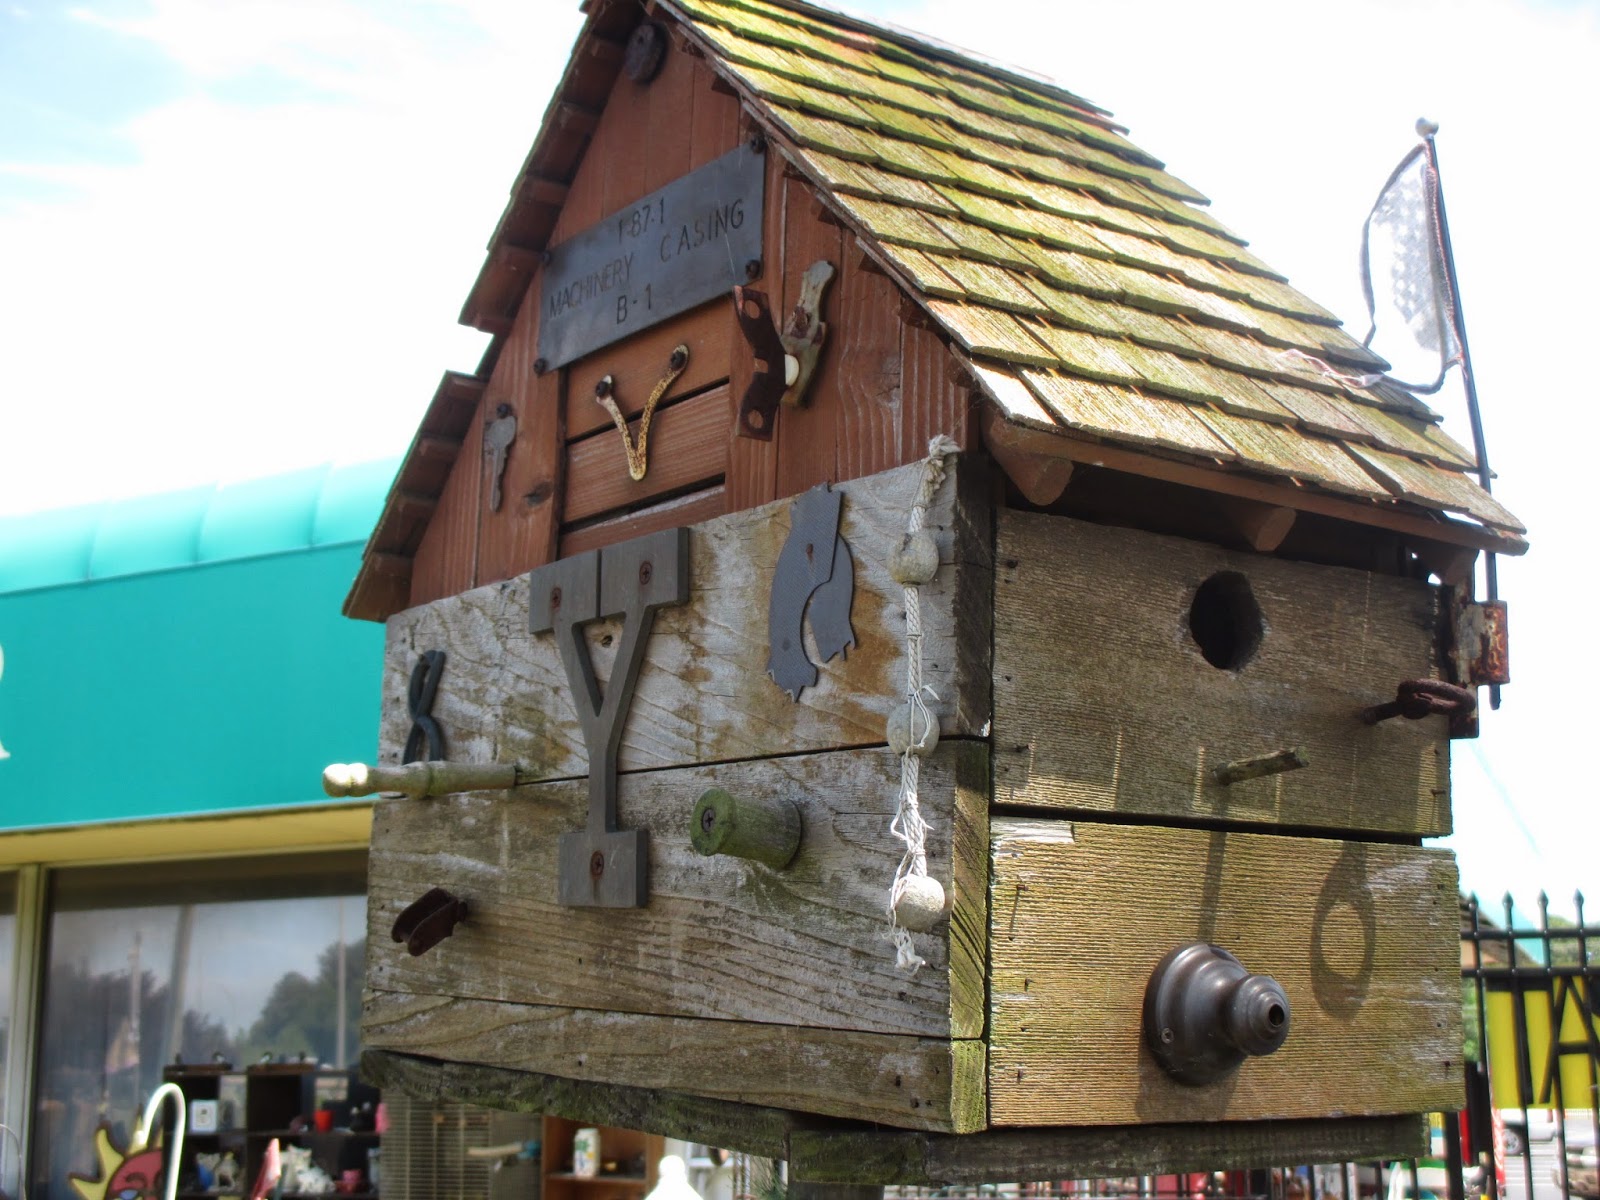
So I walk around out there for quite a while and discover these bird houses made out of recycled materials:
As I continued to look I found more and more of these gems!  I quickly went in and asked if I could take some pictures in the garden area, she looked at me like I had 3 heads but said yes I could take pictures.  Here are some more I found:

I found the #8 on a lot of the birdhouses, I wish I
could find the artist to ask him/her about it


After I took my pictures I went back inside to find out more about the artist. When I approached the desk I said "I'm interested in the birdhouses outside." She said "All of them?!" (Like I wanted to buy them all!  They were quite pricey.) I said "Oh no I'm interested in the artist, do you know who made them?"  Again a look of "Are you really interested in those old things??"  Then she gave a curt answer "... one of the sellers owns that part out there, he makes them and tries to sell them here".  She obviously wasn't going to give me any info and didn't want to help him out either. 

I am truly sorry for not giving this artist credit so if you're in the Virginia Beach area and can find out any more about this artist I will be sure to update this post.


Saturday, January 4, 2014

Another New Endeavor

In 2000 I started garment sewing.  I eventually started quilting, something I said I'd never do, but that's another story.  It only took a few years for that passion to fade but I still loved my sewing machine.  I think the reason why that passion died was because I could never get the clothes to fit right. Plus I found other artistic endeavors to pursue.  I definitely have ADD when it comes to my creative brain!

My husband and I have been long time fans of Project Runway and for me fabric has always been a great source of inspiration.  I love their challenges!  One of the challenges was to shop a pet store for materials and one contestant made a dress out of dog collars.  One of the things I noticed on each episode was that they used dress forms.  Hmmm, I wonder if I got a dress form in my size would that would help me?  Yes!

(Stick with me here)... I LOVE Pinterest and have over 100 boards on my page.  One of my newer boards is called "Altered Clothing".  Instead of starting from scratch I could piece-meal different clothes.
This was the first piece I fell in love with (not created by me):
And this is another one (I love how she did the flowers):
And one day I aspire to do something like this (if only there were more hours in a day!)
So you guessed it!  My newest endeavor is Altered Clothing!  I went to my local thrift store last week and bought three articles of clothing.  A gray sweater which will be my base piece.
A black net-like shirt for draping:
And a dark charcoal gray knit shirt because I liked the "crochet" detail on the back:
                                                           Front:
                                                        Back:

My first cut was right up the middle of the front of the sweater because my original thought was to make a cardigan like the pink one in the first picture.  I ended up sewing it closed closer to the neck and leaving it open at the bottom, eventually adding the charcoal gray knit to that area so I could wear it like a sweater without my belly hanging out.
I cut the crochet off the back of the knit shirt and hand sewed it onto the back of my sweater.  I had two flowers left over so I added some detail to those and sewed those on the front.  For the net-shirt I used the sleeves.  I reattached these to the cut off sweater sleeves.
And this is the end product:


I finally bought myself a dress form for Christmas and I love it although I do wish I was on the smaller end of the measurements but alas I am not.