Under The Sea felt and fabric applique and embroidery is finally finished, hooray!!
To remind you, this was a photo of it almost completed but I still had to finish the embroidery inside the seaweed plus add more beads and shells:
I added little red pearls to the red fabric coral (and black beads to the fishes eyes).
See if you can find five real seashells:
Give up???
.
.
.
.
.
.
.
.
.
.
.
.
.
I also added more blue beads to the two blue waves at the top; and if you look closely I used green AND blue metallic thread for the seaweed embroidery.
This is now hanging in my studio space (and is for sale) at Olde Towne Art in Portsmouth, VA. Under The Sea measures 20" X 24"
While on Pinterest I came across this absolutely beautiful watercolor of a ballerina. I think what caught my eye was that it wasn't a normal ballerina pose. The artist, Inslee Haynes, named it Tutu, Aerial View and I just fell in love! This became my inspiration piece for my first art quilt. Please visit her blog The Sketch Book so you may learn more about this talented artist.
So the first thing I needed to do was to graph the image and enlarge it.
Next I traced the pattern and cut out the pieces:
From there I found fabric for the skirt and fused it onto a piece of light green flannel. I thought about changing the colors to pinks but then decided that greens and blues (the original colors the artist used) were more interesting.
I then stitched green-with-gold-sparkle tulle into the center to make it look more like a tutu:
From there I decided that it now needed more blue so I cut strips of shimmery blue tulle and added them around the skirt:
It still needed more "bling" so I hand stitched blue and green beads onto the blue strips:
Her body was felt applique and her hair was "doll hair" found at my local craft store:
I picked my fabrics for my boarders:
And then quilted everything except her body and her tutu:
Fixing Her Hair is now hanging (and is for sale) at Olde Towne Art in Portsmouth, VA
Well both of my boys are out of school now so life has gotten a little bit more hectic around here. The day before they got out of school I finished another quilt. I had pieced the top together about a year ago and tied it but didn't like the tied look so it sat folded up under my bed for a year. I will do an entire post about it with lots of pictures later but the pictures for now are my space at Olde Towne Art in Portsmouth. The recently finished quilt is in my space on the quilt rack in blues and greens and purples.
In three days I will leave for my Mommy Getaway!! (In the past I've called it my Art Retreat) I have always been fascinated with the Amish and the Amish lifestyle so for about six years now I've been "getting away" to Lancaster, PA. Sometimes I stay at B&B's and other times I stay in hotels. I look forward to this trip every year. You can read about one of my past trips here: http://kimagination1.blogspot.com/2009/12/my-art-retreat.html
I will be taking some of my hand sewing projects but I have created a jam packed list of things to do during the day so I may be to pooped at night to even think about sewing, we'll see.
I think the reason why I haven't posted in a while is because hand sewing takes awhile! I am still in love with felt and fabric applique and this is what I am now doing most nights after my boys go to bed.
I haven't worked on this project much more except for sewing blue beads into the water pattern and a few pearls into the rocks and shells at teh bottom. As you can tell I still haven't finished the metallic green embroidery work in the the coral.
The reason why I haven't finished my underwater project is because I've been spending time In My Flower Garden. Please don't be fooled, I don't have a green thumb... I've been creating a felt garden. This was the the beginning stage:
I mount my finished pieces on stretched canvas (like I did with Gypsy Love) so that's what the white chalk outline is for. This piece will eventually measure 8" X 10".
If you have been reading this blog for a while you know how much I love buttons and painting on them. So after I cut out these designs I found 5 of my painted buttons that I thought went pretty well with the colors of felt I had chosen. Then... let the hand sewing and embroidery (and bead work) begin!!
And this is my newest piece I finished a few days ago. In My Flower Garden.
Close up of details:
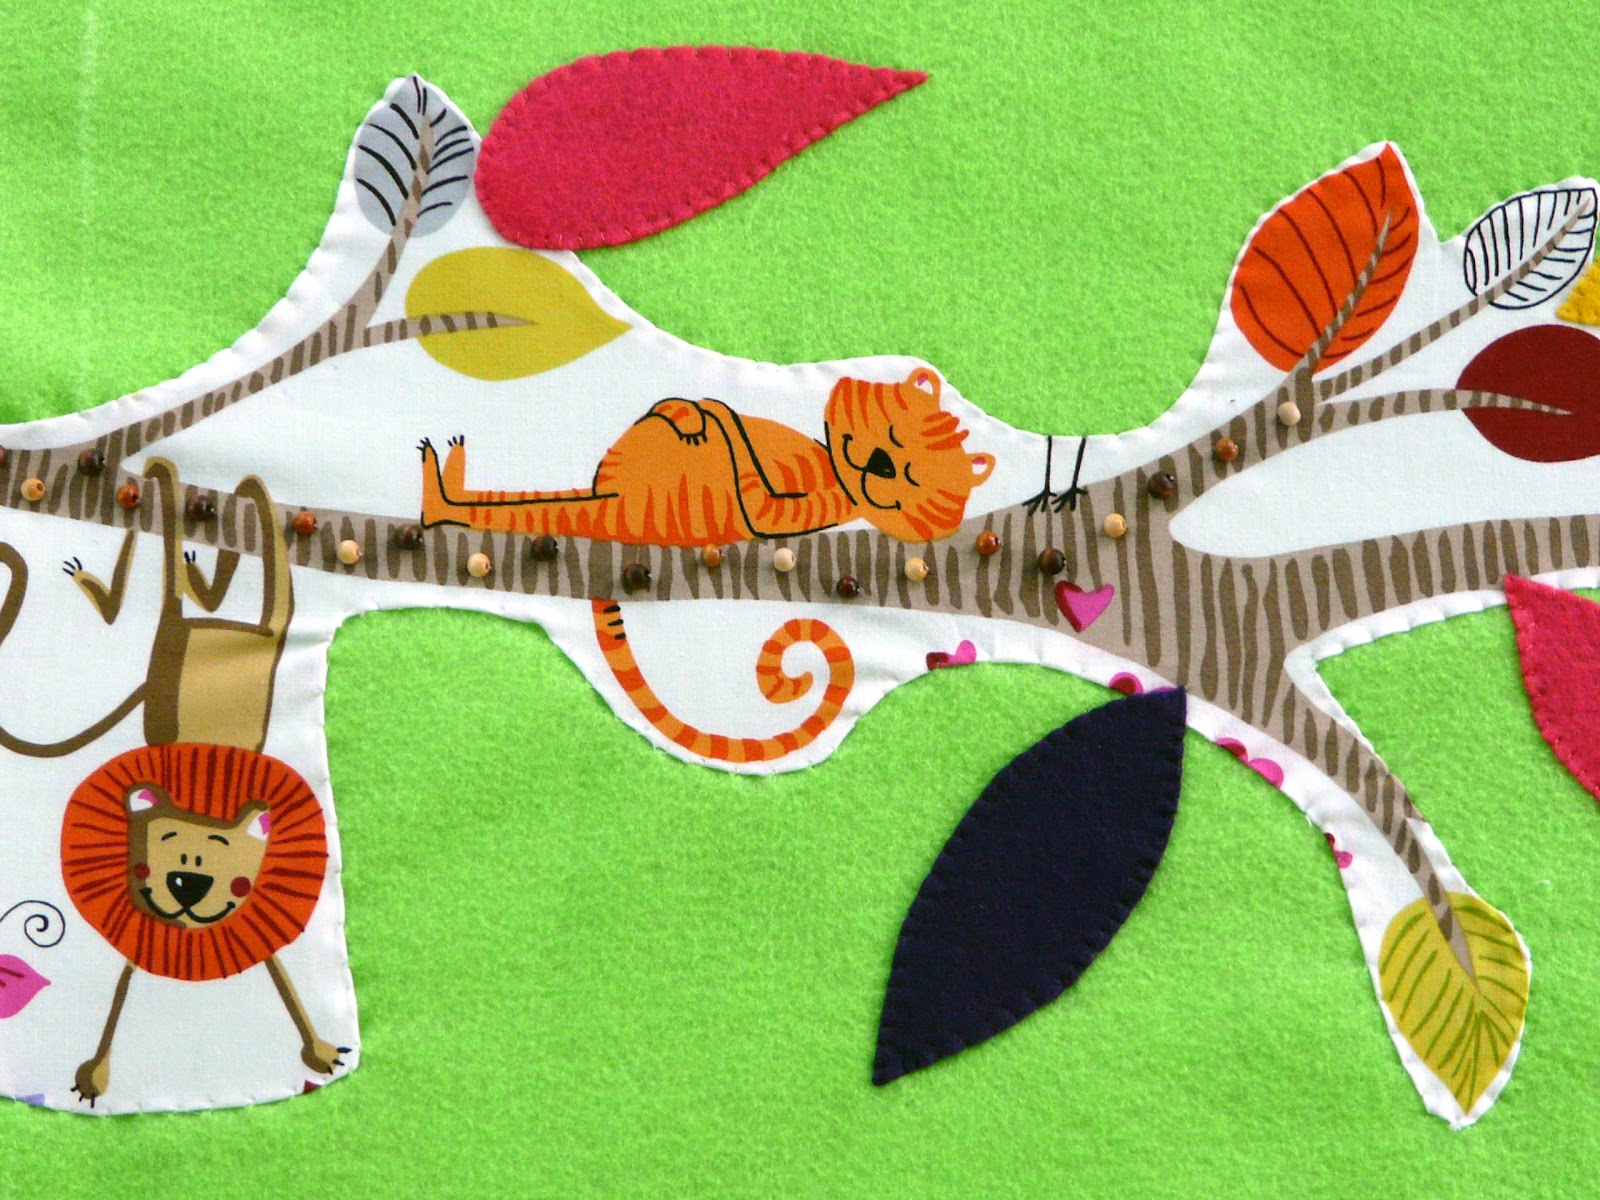
And right now I would get back to my underwater felt applique but I found this adorable fabric the other day that I knew immediately what I was going to do with it. First it involved making a 40" X 12" frame, buy felt to cover the frame then start appliqueing!
The cat laying on the branch on the left hand side caught my eye in the store. Again if you see the white chalk lines, this is where the felt will be wrapped around the canvas.
I have also added 7 felt leaves to fill it in and to have fun doing bead work on them later. Inspiration will be taken directly from the leaves in In My Flower Garden. The two dark leaves are purple not black as they appear.
The only work I've done on this piece so far, besides sewing everything down, is to start sewing wooden beads onto the branch but I have lots more to go so stay tuned!
Most people that know me know that I have ADD when it comes to my art stuff, one week I'll be sewing and then the next week I may be painting. Other people can't keep up with me but this is how my mind works. I have found something that is so easy and so addictive that (once again) I keep returning to it, it's making fabric bowls. It does take time and is very tedious but I love the process of one coming together. We had a huge art festival this weekend near my art gallery so I decided to make a few more of these fun bowls. Six to be exact:
They are now all for sale at Olde Towne Art in Portsmouth, VA
My cousin Susan has always been intrigued by the thought process of my ideas, which I've never paid attention to, but am now more keenly aware of. So just for Susan I'm going to write down the steps that lead me to today's blog post.
1. Quilt convention in February ---> bought wool felt pattern packet to make a candle mat
2. Wool Felt ---> Craft Felt ---> searched for an old project I had started months ago
3. Small project became large project with beads and sequins and embroidery
(See previous post called Gypsy Love)
4. What else could I do with felt? ---> Searched for more felt project books online
5. Found my next endeavor, making little people!
This may be my cheapest project yet!
All I need are pipe cleaners (now called chenille stems) from my kids craft box.
Little felt pieces - .30 cents a sheet
Embroidery floss - have tons of from my cross stitch days
Markers for the face - who doesn't have a marker laying around!
Wooden balls for the head - 3.00 for a huge bag
And the last thing I need is time - PRICELESS!
First you have to measure and bend the pipe cleaners according to what size doll you want. Her patterns range from a 1 1/2" doll to 4". I'm going to start with the 4" size because I plan to do a lot of decorating on their jackets and skirts. A good hands-on activity to do at night while watching tv is wrapping the pipe cleaners. These are my first five that I will be "dressing" in the next few days:
The only thing I don't like about the little figures in the book are the way the faces are drawn so mine will be be getting a face lift plus more sequins and no acorn hats.
Here are some pictures from the book:
I purposely cut off the head in this picture so you could see the detail of the clothes:
I'm not sure I'll make any fairies but with some pink tulle I may design a ballerina
My husband and boys are out of town today so I may actually find some time to sit down and dress my little people. But we have a huge art festival coming into town tomorrow (right near my art gallery) so I'm trying to finish up six of my fabric bowls for my studio too. Oh the life of an artist... I LOVE IT!
This post was going to be combined with another one but I think I just need to share with you my new found love of sequins. It all started with my first project Gypsy Love (previous post). I found that to add more sparkle to something I could stitch on sequins because I didn't want to use glitter glue, I do have my limits.
I already had a tremendous amount of sequins that my mom pawned off on me at some point. I had no idea what I would ever do with them but I never turn down any art or craft product.
So as you can see I clearly didn't need any more. Besides what other types of sequins could possibly be out there? Well that was all I needed to go searching on the internet to see what was out there. I really didn't think I would find anything other than circles, boy was I wrong!!
I came across this company called Cartwright's Sequins. I was blown away!! The sizes range from 2mm - 30mm and they have shapes like squares, butterflies, fans and you have to see their kaleidoscope sequins, they look like mini doilies.
Here are 6 of the 8 different designs I ordered that arrived a few days ago:
Look at the hologram ones:
But my favorite so far are the square embossed ones:
I have a few ideas for these but it's getting late so you'll have to wait until tomorrow when I write my next post. Good night!
I like deadlines because it makes me finish projects like the one I wrote about in the previous post. I did end up finishing my felt applique in time for the show AND I decided to put a price tag on it too. When I finished it, and mounted it on a stretched canvas, I still felt like it lacked something... more beads! So I added the tassels at the bottom, again all hand strung.
Close-up of bead work:
Details, details: